What felt like an ever growing mountain of work over the last two months has finally come to a close! There were some super rewarding days where we had a lot to show for our efforts and some days we just wanted to curl up into a ball because nothing was going right. But this is what we signed up for and we took the bad with the good every step of the way. Accomplished doesn’t even begin to describe how we are feeling. We had done research but when it came down to completing the tasks we were quickly reminded that we had no clue what we were doing- the theme of the entire build. And despite what felt like total imposter syndrome, we built every single aspect of the van (along with a ton of
help from family and friends) and could not be prouder of ourselves or happier with how our beautiful home on wheels turned out. We can’t wait to move in and get on the road!
 |
| Miles checking out his new home. |
 |
| He's not sure about it quite yet :) |
First some catch up on what the final part of the build consisted of:
Cabinets
The upper cabinets took a little finagling to get the secured to the point they or the doors wouldn’t rattle. We secured them with lag screws to mounting strips made of 2x4’s that were screwed into the metal frame of the van. We also installed some magnet door catches to help keep the door closed along with a piston hinge on each door to support them when they are open. The lower cabinets were also screwed into mounting strips as well as into the floor to keep them secure.
 |
| Upper cabinets fully installed. |
 |
| Upper cabinet with the piston hinge. |
 |
| Lower cabinets installed. |
Frames
Framing in the windows is exactly how it sounds. The wall sits about 4-5” away from the frame of the van due to the curves and nature of putting walls in a van. And the windows sit directly at the frame of the van. We essentially wanted to build a frame to close the gap between the wall and the windows, or a windowsill if you will.
Framing windows was a concept that isn’t super well documented in the #vanlife community so we weren’t really sure how we were going to go about accomplishing this- so we decided to wait until the end to figure it out. You may have seen our Instagram stories, but this was a huge lesson for us. That is definitely not what we should have done because there was no way to mount the frame securely to 1/8” thick plywood walls. Go figure.
So we ended up pulling down the walls to mount the frames directly to the metal using metal angles to assist. But in order to pull down the walls, we had to pull down the cabinets too. Lovely.
Once everything was down we attached 3/4” plywood as our mounting piece to the metal angle. We then attached the wall again and from there we attached veneers with 1/4” plywood that we painted white. Throw on some corner molding to cover the seams of the frame and the wall and you have a fully complete look!
All in all, the solution we came up with worked perfectly and we are happy we did the extra work- though were kicking ourselves knowing the entire time it didn’t have to be extra work :)
 |
| Post removal of cabinets and walls, see the frame mounted around the flare on the left side of the photo? |
 |
| Here is the frame built around the window. |
 |
| The flare after the wall was put back up. |
 |
| The flare and window after the cabinets, veneer, and molding was put in place. |
Plumbing
Another DIY job and this one went really well! We have a 21 gallon fresh water tank that fits right over one of our rear wheel wells. The tank has 4 ports on them. Port 1 is our fill port, this is where we secure a hose to the tank to fill our fresh water. Port 2 is our pump port where our water flows out of the tank and to the water pump. Port 3 is a drain, used when needing to drain the entire tank for maintenance. Port 4 is a vent.
 |
| Our fresh water tank, located in the garage/under the bed and over the passenger rear wheel well. |
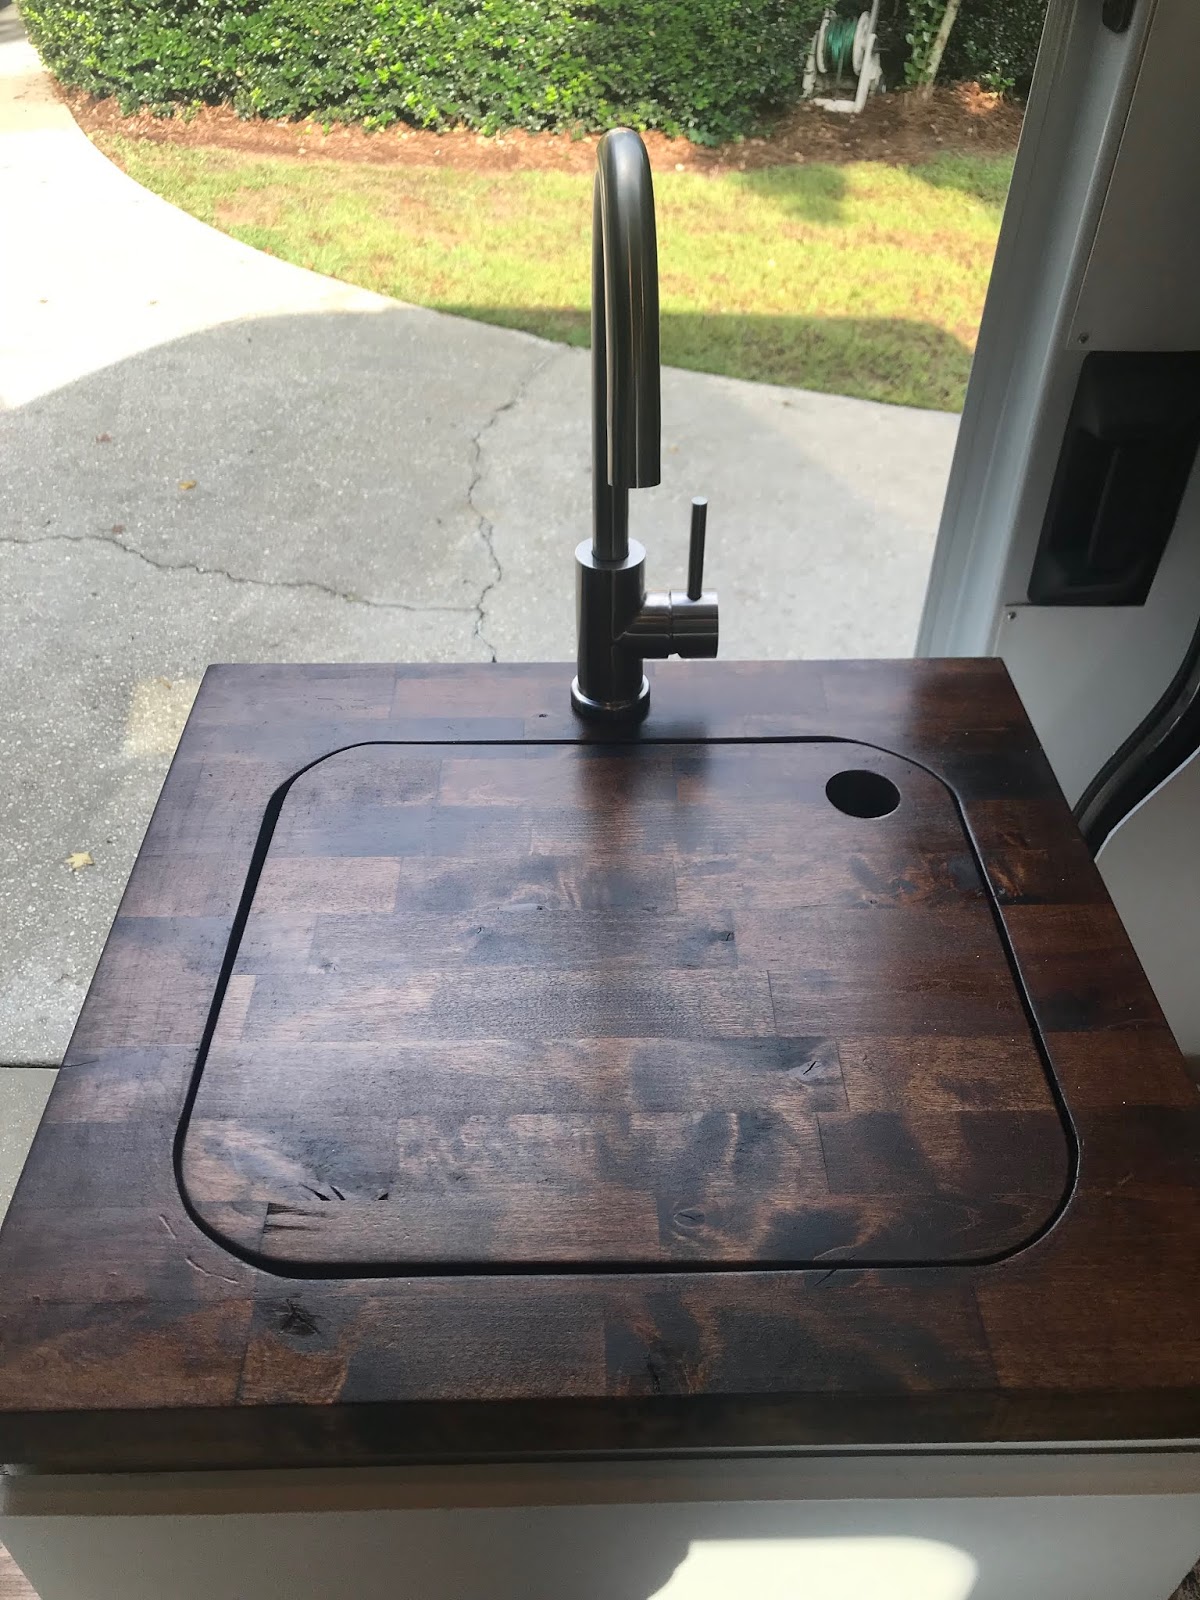
From the pump we have water flowing to our faucet in the kitchen. From the kitchen sink, we have water draining into two places. 1) a 5 gallon grey water tank that we will drain as needed and 2) through to the floor in case we want/need to drain outside the van instead of our grey water tank.
 |
| Our kitchen sink. The butcher block cut out doubles as a cutting board and giving additional counter space. |
 |
| Under the sink view.You can see the hole in the ground and the grey water tank. This is where our sink will drain. You can also see a funnel... keep reading for details on that :) |
From the pump we also have water flowing to the back of the van where we have mounted our tankless hot water heater/shower. This will allow us to take outdoor showers, clean the pup, gear, etc.
 |
| Our "outdoor" shower. |
And my personal favorite: the pee funnel! We have no toilet in the van but we did opt for a pee funnel. This will act to funnel pee out of the van through the same hole in the floor where our sink drain can go. This will be super helpful if we have to pee in the middle of the night and we happen to be camping in a crowded area, if it’s raining and we don’t want to go outside, etc.
 |
| Jordyn on the demo for how to use the pee funnel. |
Bench Seats and Table
In between our bed and lower cabinets we added some bench seats that face each other. The tops open up on a hinge for additional storage underneath. The tops are covered with 2” foam, batting, and fabric and secured with a staple gun.
 |
| Front view of the bench seat. |
 |
| Open bench seat. |
In between the seats, there is the lower cabinet that is underneath our bed and the upper drawer is actually a pull out table!
 |
| Table drawer closed. |
 |
| Table drawer open. |
 |
| Top view of bench seats and table drawer. |
Details, details, details...
My favorite part!
 |
| We went to a local home improvement stores in hopes to find less generic hardware and hooks for our cabinets and found some really great stuff! |
 |
| Upper cabinet hardware. |
 |
| We also added in some insulated blackout curtains for the back windows as well as to separate the cab from the living space. |
 |
| One of the more functional details was a DC Sirocco fan that can move to face any direction to help circulate air in the living space. |
A final coat of touch up paint to cover up any dings from install and we are ready to move in! Stay tuned for a full tour!!


Comments
Post a Comment